Top Reasons for Carving Using a Dremel
1. Precision and Control
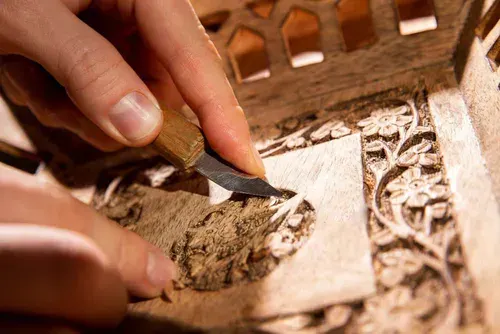
A Dremel tool provides unmatched precision, allowing users to execute intricate designs and detailed patterns with ease. Its ergonomic and lightweight design ensures a firm grip and smooth handling, reducing the risk of errors during carving. The adjustable speed settings enhance control, making it easier to achieve clean, sharp lines and intricate details. For beginners and professionals alike, the Dremel is a trusted tool for accuracy.
2. Versatility in Applications
The Dremel is a versatile tool capable of carving various materials, such as wood, metal, glass, and stone. Its compatibility with an extensive range of attachments and bits makes it adaptable to different projects. This flexibility enables users to switch effortlessly between tasks, from delicate engravings to more robust carving jobs.
3. Ease of Use
Designed with user-friendliness in mind, the Dremel features simple controls and adjustable speeds. Its straightforward operation ensures accessibility for beginners, while professionals can use it for more advanced techniques. Its ease of use makes learning and mastering the tool quick and efficient.
4. Compact and Portable
The Dremel’s compact design and portability set it apart from traditional carving tools. Its lightweight build and cordless options allow for easy transport, making it convenient for both indoor and outdoor carving projects.
5. Efficiency and Speed
With its high-speed rotation and powerful performance, the Dremel significantly speeds up carving tasks. Its ability to complete intricate designs quickly without sacrificing quality ensures efficient progress, making it ideal for time-sensitive projects.
Styles That Embrace Carving ideas
1. Rustic Style
Rustic style carving embraces the beauty of nature, incorporating organic textures and earthy tones. It often features designs inspired by trees, leaves, animals, and natural elements, creating a warm and inviting atmosphere. Carved wood with a rough, weathered finish or reclaimed wood is commonly used in rustic carving, which evokes a sense of simplicity and raw authenticity. This style works well for creating cozy, country-inspired interiors or cabin-like spaces. Carved furniture pieces, wall decor, and accents like picture frames or mantels add character and charm to a rustic room. The appeal lies in the natural beauty of the wood and the craftsmanship that brings these elements to life, making rustic style perfect for those who appreciate the outdoors and a more relaxed, lived-in aesthetic.

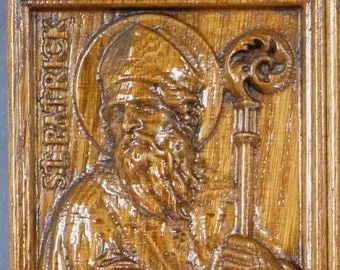
2. Traditional Style
Traditional style carving is known for its detailed, timeless patterns such as floral designs, scrollwork, and geometric motifs. These carvings are typically intricate and symmetrical, often evoking classic craftsmanship from historical periods like the Renaissance or Victorian eras. Traditional carved elements are commonly found in antique-style furniture, crown molding, and architectural details. This style offers elegance and sophistication, adding a sense of opulence to a space. Whether it’s on a wooden chair, door frame, or mantelpiece, traditional carvings tend to reflect a refined aesthetic. The focus is on symmetry, intricate patterns, and high-quality craftsmanship, making it ideal for formal settings, historical homes, or spaces that seek to evoke a sense of timeless beauty. The use of rich, dark woods often complements the luxurious nature of traditional carvings.

3. Modern Style
Modern style carving emphasizes clean lines, minimalism, and geometric designs. It is less about intricate details and more about simplicity, where the natural shape and texture of the wood often take center stage. Modern carvings use abstract or geometric shapes like circles, squares, or organic forms to create a contemporary, sleek aesthetic. The focus is on function and form, with carvings often serving both decorative and utilitarian purposes. In a modern home, these carvings may be seen in furniture, wall art, or architectural elements like doors and panels. The minimalist approach means fewer, but more deliberate, details, and the materials used are often lighter, such as maple or ash. The result is a stylish, uncluttered atmosphere that complements the overall clean lines and simplicity of modern interiors. Modern style carving works well in spaces where elegance meets functionality.

Popular carving woods
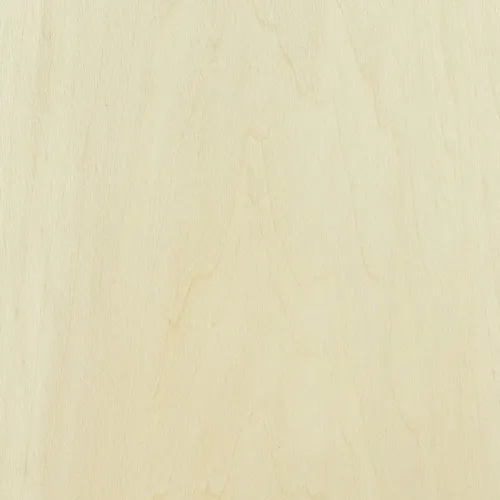
1. Basswood
Basswood is a popular choice for woodcarvers, especially for those using a Dremel, due to its softness and workability. It has a fine, even grain that allows for smooth carving and detailing without splitting or chipping. Lightweight and easy to handle, basswood is an excellent option for beginners and professionals alike. It’s particularly suitable for projects requiring intricate designs, such as figurines or relief carvings. Its neutral, pale color also makes it ideal for painting or staining, offering versatility for various artistic styles.

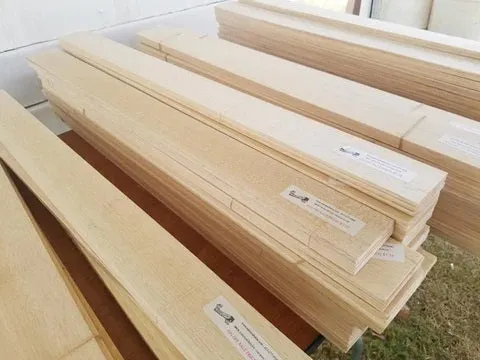
2. Balsa Wood
Balsa wood is one of the lightest and softest woods available, making it incredibly easy to carve with a Dremel. Its soft texture allows for quick shaping and detailing, but it requires a delicate touch to avoid accidental breakage. Balsa is ideal for small, detailed projects like model making or decorative items. It’s also widely used in crafting and DIY projects due to its affordability and accessibility.
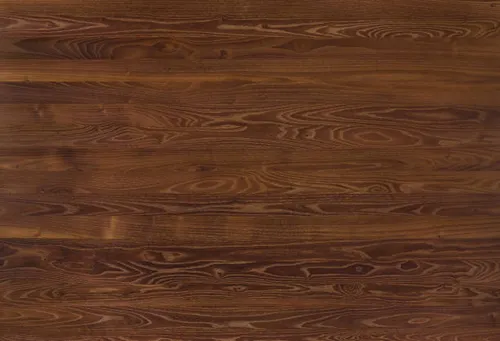
3. Walnut
Walnut is a rich, dark hardwood known for its striking grain patterns and durability. While it is a tougher wood compared to softer varieties like basswood or balsa, it still carves well with a Dremel when using the proper tools and techniques. The wood’s dense texture makes it ideal for intricate designs and deep detailing. Walnut is often chosen for high-end woodworking projects, such as furniture or decorative carvings, because of its elegant finish and ability to polish to a beautiful luster. Its strength also makes it suitable for functional items that will be subject to wear over time.
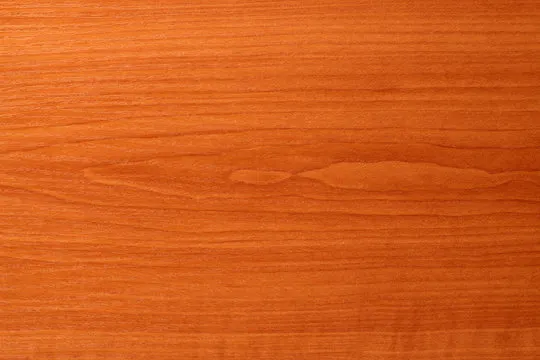
4. Cherry
Cherry wood is a moderately hard hardwood with a smooth surface and a rich, reddish-brown color that darkens with age. It’s a favorite among carvers due to its ease of carving while still maintaining its structural integrity. Cherry is perfect for creating detailed, fine carvings, such as intricate reliefs or ornamental designs. It offers a subtle natural grain that adds to the beauty of the finished piece. Cherry’s dense composition allows for a smooth and polished finish, making it an excellent choice for high-quality furniture and decorative works.
5. Oak
Oak is a strong and dense hardwood, known for its bold, pronounced grain. It is more challenging to carve than softer woods but produces highly durable and beautiful results. Oak is ideal for larger, more substantial carvings such as furniture, sculptures, or decorative accents. It holds up well under pressure, making it perfect for functional pieces that need to withstand wear. Oak’s distinct grain pattern adds character to carvings, and its versatility means it can complement both rustic and modern farmhouse styles. Due to its density, it may require more patience and sharper tools when carving with a Dremel.

Quick Tips for Embracing carving ideas
1. Choose the Right Wood
The type of wood you choose significantly impacts the ease and success of your carving project. Softer woods like basswood and pine are ideal for beginners as they are easier to carve and shape. Harder woods, such as oak or maple, offer more durability but may require sharper tools and more effort. Always select wood that is free of knots and imperfections to ensure smoother carving.
2. Start with Simple Designs
When you’re new to carving, start with simple, basic designs. This allows you to build your skills gradually without feeling overwhelmed. Simple patterns, like geometric shapes or basic textures, help you become more comfortable with the carving tools and techniques. As your skills improve, you can progress to more intricate and detailed patterns.
3. Use the Right Tools
Investing in high-quality carving tools is essential for achieving precise, clean cuts. Dremels, gouges, and chisels are some of the most commonly used tools for carving. Make sure to pick tools that suit your project’s requirements. A rotary tool, for example, can help with intricate details, while larger gouges can work for deeper cuts.
4. Take Safety Precautions
Carving can be a fun and rewarding activity, but it also requires attention to safety. Always carve away from your body and hands, and wear protective gloves to prevent injuries from slipping tools. Additionally, wear safety goggles when using power tools like Dremels to protect your eyes from flying debris.
5. Practice Regularly
Like any craft, carving improves with practice. Start with small practice pieces and gradually take on larger projects. Regular practice helps you refine your technique and become more confident in your skills. It’s essential to enjoy the process, even if the results aren’t perfect at first. Over time, your carving skills will improve, and you’ll be able to create intricate and beautiful works.
6. Experiment with Different Styles
Carving is an art form with endless possibilities. Try experimenting with different carving styles, such as relief carving, chip carving, or whittling, to discover what suits your preferences. Each style offers its own set of techniques and challenges, and trying out different ones helps you diversify your skills and understand the nuances of the craft.
7. Plan Your Design Ahead of Time
Before starting your carving project, sketch out your design on paper or directly on the wood. This helps you visualize the final result and ensure that you have a clear plan to follow. It’s also helpful to break down complex designs into manageable sections, which can make the carving process more efficient and organized.
8. Work in a Well-Lit Area
Good lighting is crucial when carving, as it allows you to see the fine details and prevent mistakes. Set up your workspace in a well-lit area or invest in a task lamp that can direct light precisely where you need it. Proper lighting enhances your ability to carve accurately and ensures your work is both detailed and precise.
9. Take Breaks
Carving can be physically demanding, especially when working on intricate or detailed pieces. Take regular breaks to rest your hands and eyes, preventing fatigue and improving focus. This helps maintain a steady hand and minimizes the risk of mistakes.
10. Finish with Sanding and Polishing
Once you’ve completed your carving, take the time to sand and smooth the surface. Sanding removes rough edges and gives your work a polished, professional look. Use different grits of sandpaper to gradually smooth the wood, starting with coarser paper and finishing with finer grits. After sanding, you can apply a finish or sealant to protect the wood and highlight the carving details.
Conclusion
Carving is a rewarding and creative activity that allows you to transform a simple piece of wood into a beautiful, functional, or decorative item. Whether you are a beginner or an experienced carver, embracing the craft can be incredibly fulfilling. To begin, it’s crucial to select the right type of wood, tools, and design that aligns with your skill level. Starting with simple projects and gradually progressing to more intricate designs helps build confidence and expertise over time. Regular practice, safety precautions, and experimenting with different styles will enhance your carving abilities and encourage creativity.